Contents
- 1 What is the Least Expensive DIY Patio
- 2 Assessing Your Space and Needs
- 3 Paver Patios: A Budget-Friendly Option
- 4 Gravel Patios: A Low-Cost Alternative
- 5 Concrete Patios: Affordable and Versatile
- 6 Creative Patio Materials on a Shoestring Budget
- 7 Budget-Friendly Patio Furniture and Decor
- 8 Tips for Saving Money on DIY Patio Projects
- 9 Maintenance and Longevity: Maximizing Your Investment
- 10 DIY Patio Lighting: Creating Ambience on a Budget
- 11 Conclusion: Creating Your Perfect DIY Patio on a Budget
- 12 FAQs
Welcome to my comprehensive guide on creating a DIY patio on a budget. Are you looking to enhance your outdoor living space and transform your backyard into a beautiful oasis without breaking the bank? If so, you’ve come to the right place. Today, I will share with you budget-friendly ideas for creating the what is the least expensive DIY patio on a budget that fits your style and needs.
Key Takeaways
- Creating a budget-friendly DIY patio involves options like paver, gravel, and concrete patios.
- Pavers offer versatility, gravel is a low-cost alternative, and concrete is affordable and durable.
- Creative choices include reclaimed materials and upcycled furniture.
- Save on furniture by repurposing items or buying off-season.
What is the Least Expensive DIY Patio
Whether you’re a seasoned DIYer or a beginner looking to take on a new project, this guide will provide you with inspiration, step-by-step instructions, and valuable tips for saving money. Let’s get started on creating your dream patio on a budget.
Assessing Your Space and Needs
Before beginning any DIY patio project, it’s important to assess the area where you plan to build your patio. Take time to evaluate the space available and determine what you need from your patio.
- Consider size and shape: Measure the available space for your patio, taking into account any landscaping features or obstacles. Determine what shape and size patio will best suit your needs, keeping in mind that larger patios will require more materials and labor, and may be more costly.
- Decide on patio functions: Determine the main function of your patio. Will it be a space for dining and entertaining, or a relaxing retreat for enjoying the outdoors? Think about any additional features you’d like to include, such as a fire pit or water feature.
- Consider materials: Take into account the materials available for your patio project, as different materials will have different costs and installation requirements. Consider cost, durability, and maintenance needs when selecting the materials for your patio.
By assessing your space and needs, you’ll have a clear idea of the type of patio that will best suit your needs and budget.
Paver Patios: A Budget-Friendly Option
When it comes to budget-friendly DIY patio options, paver patios are a popular choice. They offer the charming look of traditional patios without the high price tag. Pavers are versatile and can be laid in a variety of patterns, from basic grids to intricate designs.
If you’re considering a paver patio for your backyard, here are some tips to keep in mind:
- Choose affordable pavers: Not all pavers are created equal. Look for options that fit your budget without sacrificing quality. Concrete pavers are often the most cost-effective choice, while natural stone can be pricier.
- DIY installation: Installing a paver patio is a relatively straightforward process that most DIY enthusiasts can handle. Research installation techniques and follow the steps carefully to ensure a successful outcome.
- Don’t forget the extras: While pavers are affordable, additional features like lighting and landscaping can quickly add up. Consider your budget for these elements and plan accordingly.
Take a look at this comparison table for a better understanding of the cost of different paver options:
| Paver Type | Price per square foot |
|---|---|
| Concrete | $3 – $6 |
| Stone | $8 – $12 |
| Brick | $10 – $15 |
A paver patio is a budget-friendly option that can add charm and value to your home. With careful planning and DIY installation, you can create a beautiful outdoor living space without breaking the bank.
Gravel Patios: A Low-Cost Alternative
If you’re looking for an inexpensive patio option, a gravel patio may be a perfect choice. Gravel patios are both affordable and easy to install, making them an excellent option for DIY enthusiasts. With the right preparation and some creativity, you can create a stunning and functional outdoor space without breaking the bank.
Before you start your gravel patio project, it’s essential to choose the right type of gravel. Pea gravel is a popular option due to its smooth texture and comfortable feel underfoot. However, it can shift and move around over time, so adding a stabilizer or border material can prevent erosion and improve stability. Another alternative is crushed stone, which is also affordable and comes in different colors and sizes.
Preparing the Area
The first step in creating a gravel patio is to prepare the area. Clear any debris and vegetation from the site, ensuring that the ground is level. If the area has poor drainage, you may need to install a drainage system before laying the gravel. Next, lay down a weed barrier fabric, which will prevent weeds from growing up through the gravel and provide additional stability.
It’s essential to choose the right border material, which will keep the gravel contained and prevent it from spreading into unwanted areas. Some affordable border options include plastic edging, bricks, or large stones. Be sure to secure the border material firmly in place before laying down the gravel.
Install the Gravel
When installing the gravel, be sure to spread it evenly over the area using a garden rake or shovel. The recommended depth for a gravel patio is around 4 inches, which will provide adequate drainage and stability. You may want to experiment with different colors or sizes of gravel to create a unique and visually appealing design.
After the gravel has been laid, be sure to compact it using a plate compactor or tamper. This step will help improve the stability of the patio and prevent shifting over time. Once the gravel is firmly in place, add any finishing touches, such as patio furniture or decor.
Maintenance and Longevity
One of the benefits of a gravel patio is its low maintenance requirements. While it may need occasional raking and leveling, there is no need for sealing or special cleaning products. However, it’s essential to keep the surrounding areas tidy and prevent debris from accumulating on the patio surface.
With proper installation and maintenance, a gravel patio can last for years, providing a beautiful and functional outdoor space at a fraction of the cost of other materials.
Concrete Patios: Affordable and Versatile
Concrete patios are an excellent budget-friendly option for DIY enthusiasts looking to transform their outdoor space. They offer a versatile and durable solution that can withstand harsh weather conditions and heavy foot traffic.
If you’re on a tight budget, creating a simple concrete patio can be a cost-effective way to upgrade your backyard. Here’s how to make a budget-friendly concrete patio with professional results:
Step 1: Plan the Layout
Before starting the project, plan the patio’s layout and mark it out with stakes and string to visualize the final product adequately. This step helps you determine the right amount of materials needed, saving you time and money.
Step 2: Prepare the Site
Prepare the patio site by clearing the area of grass and debris, and then level the soil. Next, lay down a gravel base, tamping it down, and ensuring it’s level to help with water drainage. This base acts as a foundation for the concrete and prevents it from cracking or shifting.
Step 3: Create the Forms
Create a form to hold the wet concrete in place while it cures by building a frame using wood or metal. You can determine the thickness of the frame by determining the desired thickness of your patio.
Step 4: Mix and Pour the Concrete
It’s time to mix and pour the concrete once the forms are in place. Mix the concrete according to the instructions and pour it into the form. Use a trowel to spread the mixture evenly and remove any air pockets. To create a non-slip surface, drag a broom over the wet concrete before it starts curing.
Step 5: Finishing Touches
After the concrete has been set, remove the forms and smooth the edges using a trowel. The final touches include adding sealant to protect the surface from the elements and regular wear and tear.
There are plenty of ways to enhance the appearance of your budget-friendly concrete patio. Consider adding a pop of color with a concrete stain or stamping it with a design to elevate the look.
Creating a concrete patio on a budget is an achievable DIY project with fantastic results. So if you’re looking for an affordable and versatile way to upgrade your outdoor space, a budget-friendly concrete patio may be just what you need.
Creative Patio Materials on a Shoestring Budget
If you’re looking for unique and affordable patio materials, there are plenty of options beyond traditional paving stones or concrete slabs. Embrace your creativity and consider these budget-friendly alternatives:
- Reclaimed materials: Scour flea markets, Craigslist or yard sales for reclaimed materials like old bricks, flagstones, or even broken concrete pieces. With a little bit of effort, you can create a playful and rustic-looking patio using what most people consider “trash.”
- Pallets: Wooden pallets can be found for free and transformed into an industrial-chic patio design. Simply nail them together into a DIY seating area, add some decorative cushions, and voila! You have yourself a perfect outdoor escape.
- Grass: Believe it or not, grass can be a fantastic option for a low-cost patio. Consider removing a section of your existing lawn, leveling the soil beneath, and filling it with sand and turf. In no time at all, you can create a unique and comfortable area to entertain guests or relax.
Upcycled Furniture:
Adopt an eco-friendly attitude and upcycle furniture or items from other areas of your home to use on your patio. Old dressers or bookshelves can be painted and converted into an outdoor bar. Baskets, buckets, or even an old-fashioned washtub can serve as eye-catching planters for herbs or flowers. Build your outdoor sofa or bench using wood pallets, an old headboard, or reclaimed lumber.
DIY Patio Art:
To add a personal touch to your patio, consider creating DIY decor and art pieces from budget-friendly materials. A few examples are:
- Wine bottle tiki torches
- Hanging mason jar lanterns
- Waterproof canvas wall art
- Hand-painted rock garden markers
Not only are these projects fun to make, but they will also add a unique and personalized touch to your patio design. Best of all, they won’t break the bank!
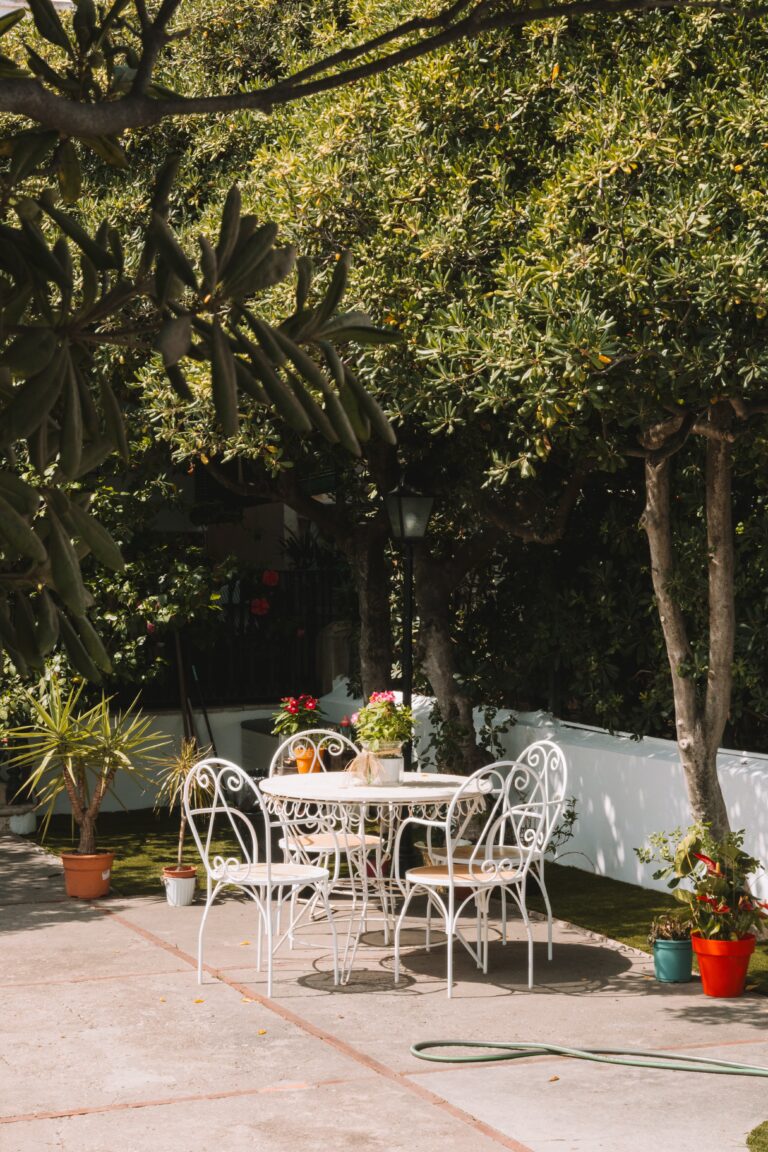
Budget-Friendly Patio Furniture and Decor
The right furniture and decor can enhance the ambiance of any outdoor space, and a patio is no exception. But often, outdoor furniture and decor can come with a steep price tag. However, there are several ways to find budget-friendly options for your DIY patio. Here are some tips:
Repurpose and DIY
Before you rush out to purchase new patio furniture, think about ways to repurpose items you already have. Old dressers can be transformed into outdoor bars, while wooden pallets can be fashioned into comfortable seating. Head to your local thrift store or flea market and look for treasures that can be easily transformed into outdoor furniture or decor with a fresh coat of paint or cushions.
Buy Off-Season
If you’re looking to save money on patio furniture, shop off-season for the best deals. Retailers often discount their outdoor furniture and decor in the fall and winter months to make room for new inventory. Keep an eye out for clearance sales, and you could score big on the perfect pieces for your DIY patio.
| Furniture and Decor Items | Price Range |
|---|---|
| Plastic Adirondack chairs | $20-$50 |
| Outdoor rugs | $30-$100 |
| Hammocks | $50-$150 |
| Outdoor throw pillows | $10-$30 |
| Folding patio table | $30-$70 |
Create Your Own Decor
Don’t overlook the power of handmade decor for your DIY patio. Consider crafting your wind chimes, birdhouses, or lanterns. Look for ideas online or in craft books, and use materials like twine, scrap wood, or mason jars for a charming DIY touch. You can even involve friends or family in the crafting process for a fun and memorable project.
Creating a beautiful and inviting DIY patio doesn’t have to drain your bank account. By repurposing items, shopping off-season, and crafting your decor, you can find budget-friendly options that reflect your style and create a welcoming outdoor space.
Tips for Saving Money on DIY Patio Projects
Transforming your outdoor space with a beautiful DIY patio doesn’t have to break the bank. With a few budget-saving tips, you can create a stunning outdoor oasis without spending a fortune. Here are some tips to help you save money on your DIY patio project:
- Shop around for affordable materials: Before purchasing any materials for your patio project, do some research to find the best deals. Compare prices at different hardware stores or online retailers to find the most cost-effective options. Don’t forget to check for sales or discounts before making your final purchase.
- Consider using alternative materials: Traditional paving materials like concrete or stone can be expensive. Instead, consider using gravel, mulch, or even repurposed materials like pallets or reclaimed wood. These options can be just as charming and add a unique touch to your patio.
- DIY your furniture and decor: Outdoor furniture and decor can also be costly. Instead of purchasing new items, consider DIYing your own furniture and accessories. There are plenty of tutorials online for creating your own patio furniture, planters, and decor items at a fraction of the cost.
- Buy in bulk: If you need to purchase a large quantity of materials, buying in bulk can save you a significant amount of money. Consider teaming up with a neighbor or friend who is also planning a patio project to split the cost of materials.
- Do as much as you can yourself: Labor costs can quickly add up, so try to do as much of the work yourself as possible. Consider enlisting the help of friends or family members to assist you. Not only will it save you money, but it can also be a fun bonding experience.
- Start small: Creating a complete outdoor oasis in one go can be overwhelming and expensive. Instead, start with a small project and build on it over time. For example, begin with a simple gravel patio and add furniture and decor over time as your budget allows.
By following these budget-saving tips, you can create a beautiful DIY patio without overspending. With a little creativity and resourcefulness, you can enjoy your perfect backyard sanctuary for years to come.
Maintenance and Longevity: Maximizing Your Investment
Proper maintenance is essential to maximizing the longevity of your DIY patio and protecting your investment. Here are some tips to help you keep your patio in top condition:
- Regular cleaning: Sweep or hose off your patio regularly to prevent dirt and debris from accumulating. A pressure washer can be used for a thorough cleaning, but be cautious not to use too much force, which can damage your patio.
- Sealing: Applying a sealant to your patio will protect it from water damage, staining, and fading. Check the manufacturer’s instructions for the recommended frequency of sealing.
- Repairing cracks: If you notice any cracks in your patio, repair them as soon as possible to prevent them from getting larger. Use a concrete patching compound to fix the cracks.
- Moving furniture: Avoid dragging heavy furniture across your patio, as this can scratch and damage the surface.
- Winter maintenance: If you live in an area with cold winters, be sure to clear snow and ice off your patio to prevent damage from freezing and thawing.
By following these maintenance tips, you can extend the life of your DIY patio and continue to enjoy your outdoor space for years to come.
Tip: Don’t forget to regularly check your patio for signs of wear and tear. Early detection and repair can save you from costly replacements in the long run.
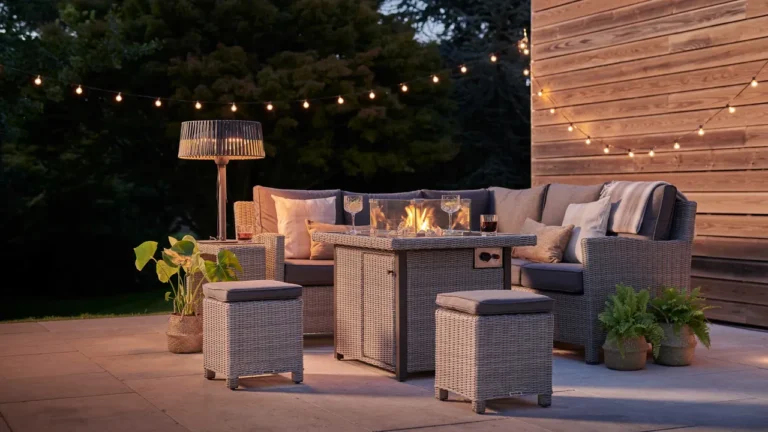
DIY Patio Lighting: Creating Ambience on a Budget
When it comes to creating an inviting and comfortable atmosphere for your DIY patio, lighting is key. Fortunately, there are many budget-friendly options available to help you illuminate your outdoor space.
Solar-Powered Lighting
One of the easiest and most cost-effective ways to light up your DIY patio is to use solar-powered lighting. These lights require no wiring or electricity, making them a low-maintenance option. Simply place the lights in a sunny spot during the day, and they will automatically turn on at dusk. Solar-powered string lights are a great choice for creating a warm and cozy ambiance, while solar-powered lanterns can provide functional lighting for dining or relaxing.
DIY Mason Jar Lights
If you’re looking for a creative and budget-friendly DIY lighting option, consider making your mason jar lights. All you need are some mason jars, solar-powered lids, and a bit of creativity. Simply fill the jars with sand or rocks to stabilize them, then insert the solar-powered lids. You can add decorative touches, such as ribbon or paint, to customize your lights to your taste.
LED Strip Lights
LED strip lights are a versatile and affordable option for illuminating your DIY patio. These lights can be cut to size and easily installed along the edge of your patio or underneath furniture. Plus, because they are energy-efficient, you can enjoy beautiful lighting without worrying about high electricity bills.
Candles and Lanterns
For a cozy and rustic look, consider using candles and lanterns to light up your DIY patio. These options are budget-friendly and can provide a warm and inviting atmosphere. Just be sure to use flameless candles or outdoor-rated candles to avoid any fire hazards.
With these budget-friendly DIY patio lighting options, you can create a relaxing and inviting outdoor space without breaking the bank. Whether you prefer the ambiance of solar-powered string lights, the creativity of DIY mason jar lights, the versatility of LED strip lights, or the warmth of candles and lanterns, there’s a perfect option out there for your DIY patio needs.
Conclusion: Creating Your Perfect DIY Patio on a Budget
Creating the perfect backyard sanctuary doesn’t have to cost a fortune. By following the budget-friendly ideas and tips presented in this article, you can transform your outdoor space into a beautiful extension of your home without breaking the bank.
Whether you choose pavers, gravel, or concrete, or get creative with unconventional materials, there’s a DIY patio option that will work for every budget and style preference.
Remember, your DIY patio project doesn’t have to end with the flooring materials. With some savvy shopping and a little bit of creativity, you can find affordable patio furniture and decor to complete the look of your outdoor oasis.
Don’t forget to take proper care of your new patio to ensure longevity. Follow the maintenance tips provided in this article to protect your investment and keep your outdoor space looking beautiful year after year.
With these ideas and insights in mind, I encourage you to embrace your inspiration and create the perfect budget-friendly DIY patio that will transform your backyard into a beautiful sanctuary. Happy creating!
FAQs
What is the cheapest option to make a patio?
The cheapest option to make a patio is by using gravel or decomposed granite and laying pavers or interlocking tiles.
What is the most affordable type of patio?
The most affordable type of patio is a gravel patio or a patio made with decomposed granite and pavers or interlocking tiles.
What is the simplest DIY patio?
The simplest DIY patio is probably a gravel patio, which involves laying a weed-blocking landscape fabric, spreading gravel, and then compacting it with a tamper.